Deploy a Custom Microsoft Teams bot in 15 minutes
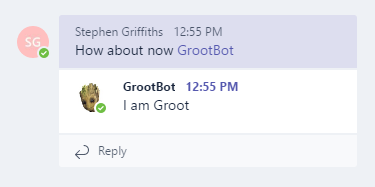
You can make a ‘Custom bot’ for Microsoft Teams without having to use the full-blown Microsoft Bot Framework. The requirements are dead simple which makes this a really fun entry point to bot-making! First you might want to check out these instructions on how to add a custom bot to Teams. This is how I made my Groot bot (pictured). Note that a bot of this simple kind can only be used in Teams channel chat - it can’t be used in 1:1 chats or on other services like Skype.

What you have to do
Host a web application over https (using a free-tier Azure Web App is ideal). The web application just needs to reply to any incoming POST requests with a tiny json object:
{
	"type" : "text",
	"text" : "Yeah, I hear you"
}
Note that this doesn’t authenticate clients in any way, so anybody could add this bot to their Teams too. The guide above has some steps for securing the bot.
Build it with a bare-bones MVC site

Start like this:
- Set up an Azure subscription for the account you use to log into Visual Studio. A free trial is available and everything we’re about to do is free
- In Visual Studio on your PC, set up a new solution with an MVC project and tweak the settings as you like. Activate ‘Host in Azure’
- When it’s ready, test the publish button in the Web Publish window to check that you can deploy to Azure alright
Now we need to tear the project down to a single controller
- Delete everything in Views, Scripts, Models
- Delete the fonts folder and Content folder
- Delete the Project_Readme.html
- Delete AccountController and ManageController
- In App_Start, delete:
- IdentityConfig.cs
- Startup.Auth.cs
There may be extra bits to do as well, I leave it to you to figure those out…
Add a little code
Now change the contents of HomeController to:
public class HomeController : Controller
{
    [AcceptVerbs(HttpVerbs.Get | HttpVerbs.Post)]
    public ActionResult Index()
    {
        if (HttpContext.Request.HttpMethod == "GET")
        {
            return View();
        }

        var reply = new
        {
            type = "message",
            text = "Yeah, I hear you"
        };

        return Json(reply);
    }
}
In Views, add a new file called Index.cshtml:
@inherits System.Web.Mvc.WebViewPage
@{
	Layout = null;
	string baseUrl = Request.Url.Scheme + "://"
		+ Request.Url.Authority + Request.ApplicationPath.TrimEnd('/') + "/";
}
<!DOCTYPE html>
<html>
<head>
	<meta name="viewport" content="width=device-width" />
	<title>Custom Bot</title>
	<style>
		html {
			font-family: sans-serif;
		}
	</style>
</head>
<body>
	<h1>Custom Bot</h1>
	<p>
		Hi! To message me, POST to this URL: <code>@(baseUrl)</code>
	</p>
</body>
</html>
If you Debug on your local machine, the page above should come up in a browser. If you test POSTing to that same URL, you should get back a JSON object like the one I mentioned at the start of this article :)
When you’re ready to test online, use the Web Publish window to deploy to your Azure web app.
You might want to make your own Team and Channel in MS Teams for testing the bot (so you don’t annoy colleages). Once you’ve done that, go in and follow the custom bot guide to add your bot.