I fixed my Yamaha PSS-A50
Finally writing this post after more than a year after actually fixing the thing, and two emails from friendly people following up on my initial findings. Big thanks to Scott and Ionică for reaching out with their experiences.
How to fix a PSS-A50 that won’t switch on
You will need a soldering iron, tweezers, bare wire, and a multimeter.
Take care and use protective surfaces, goggles, etc.
What we’re going to do
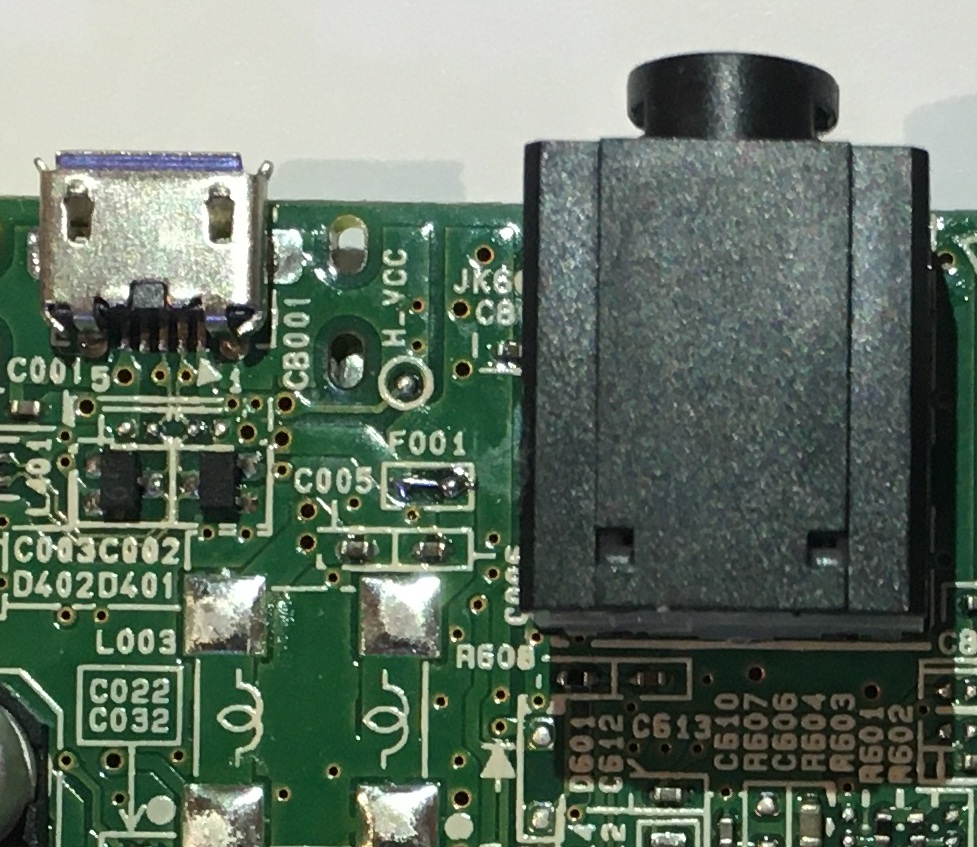
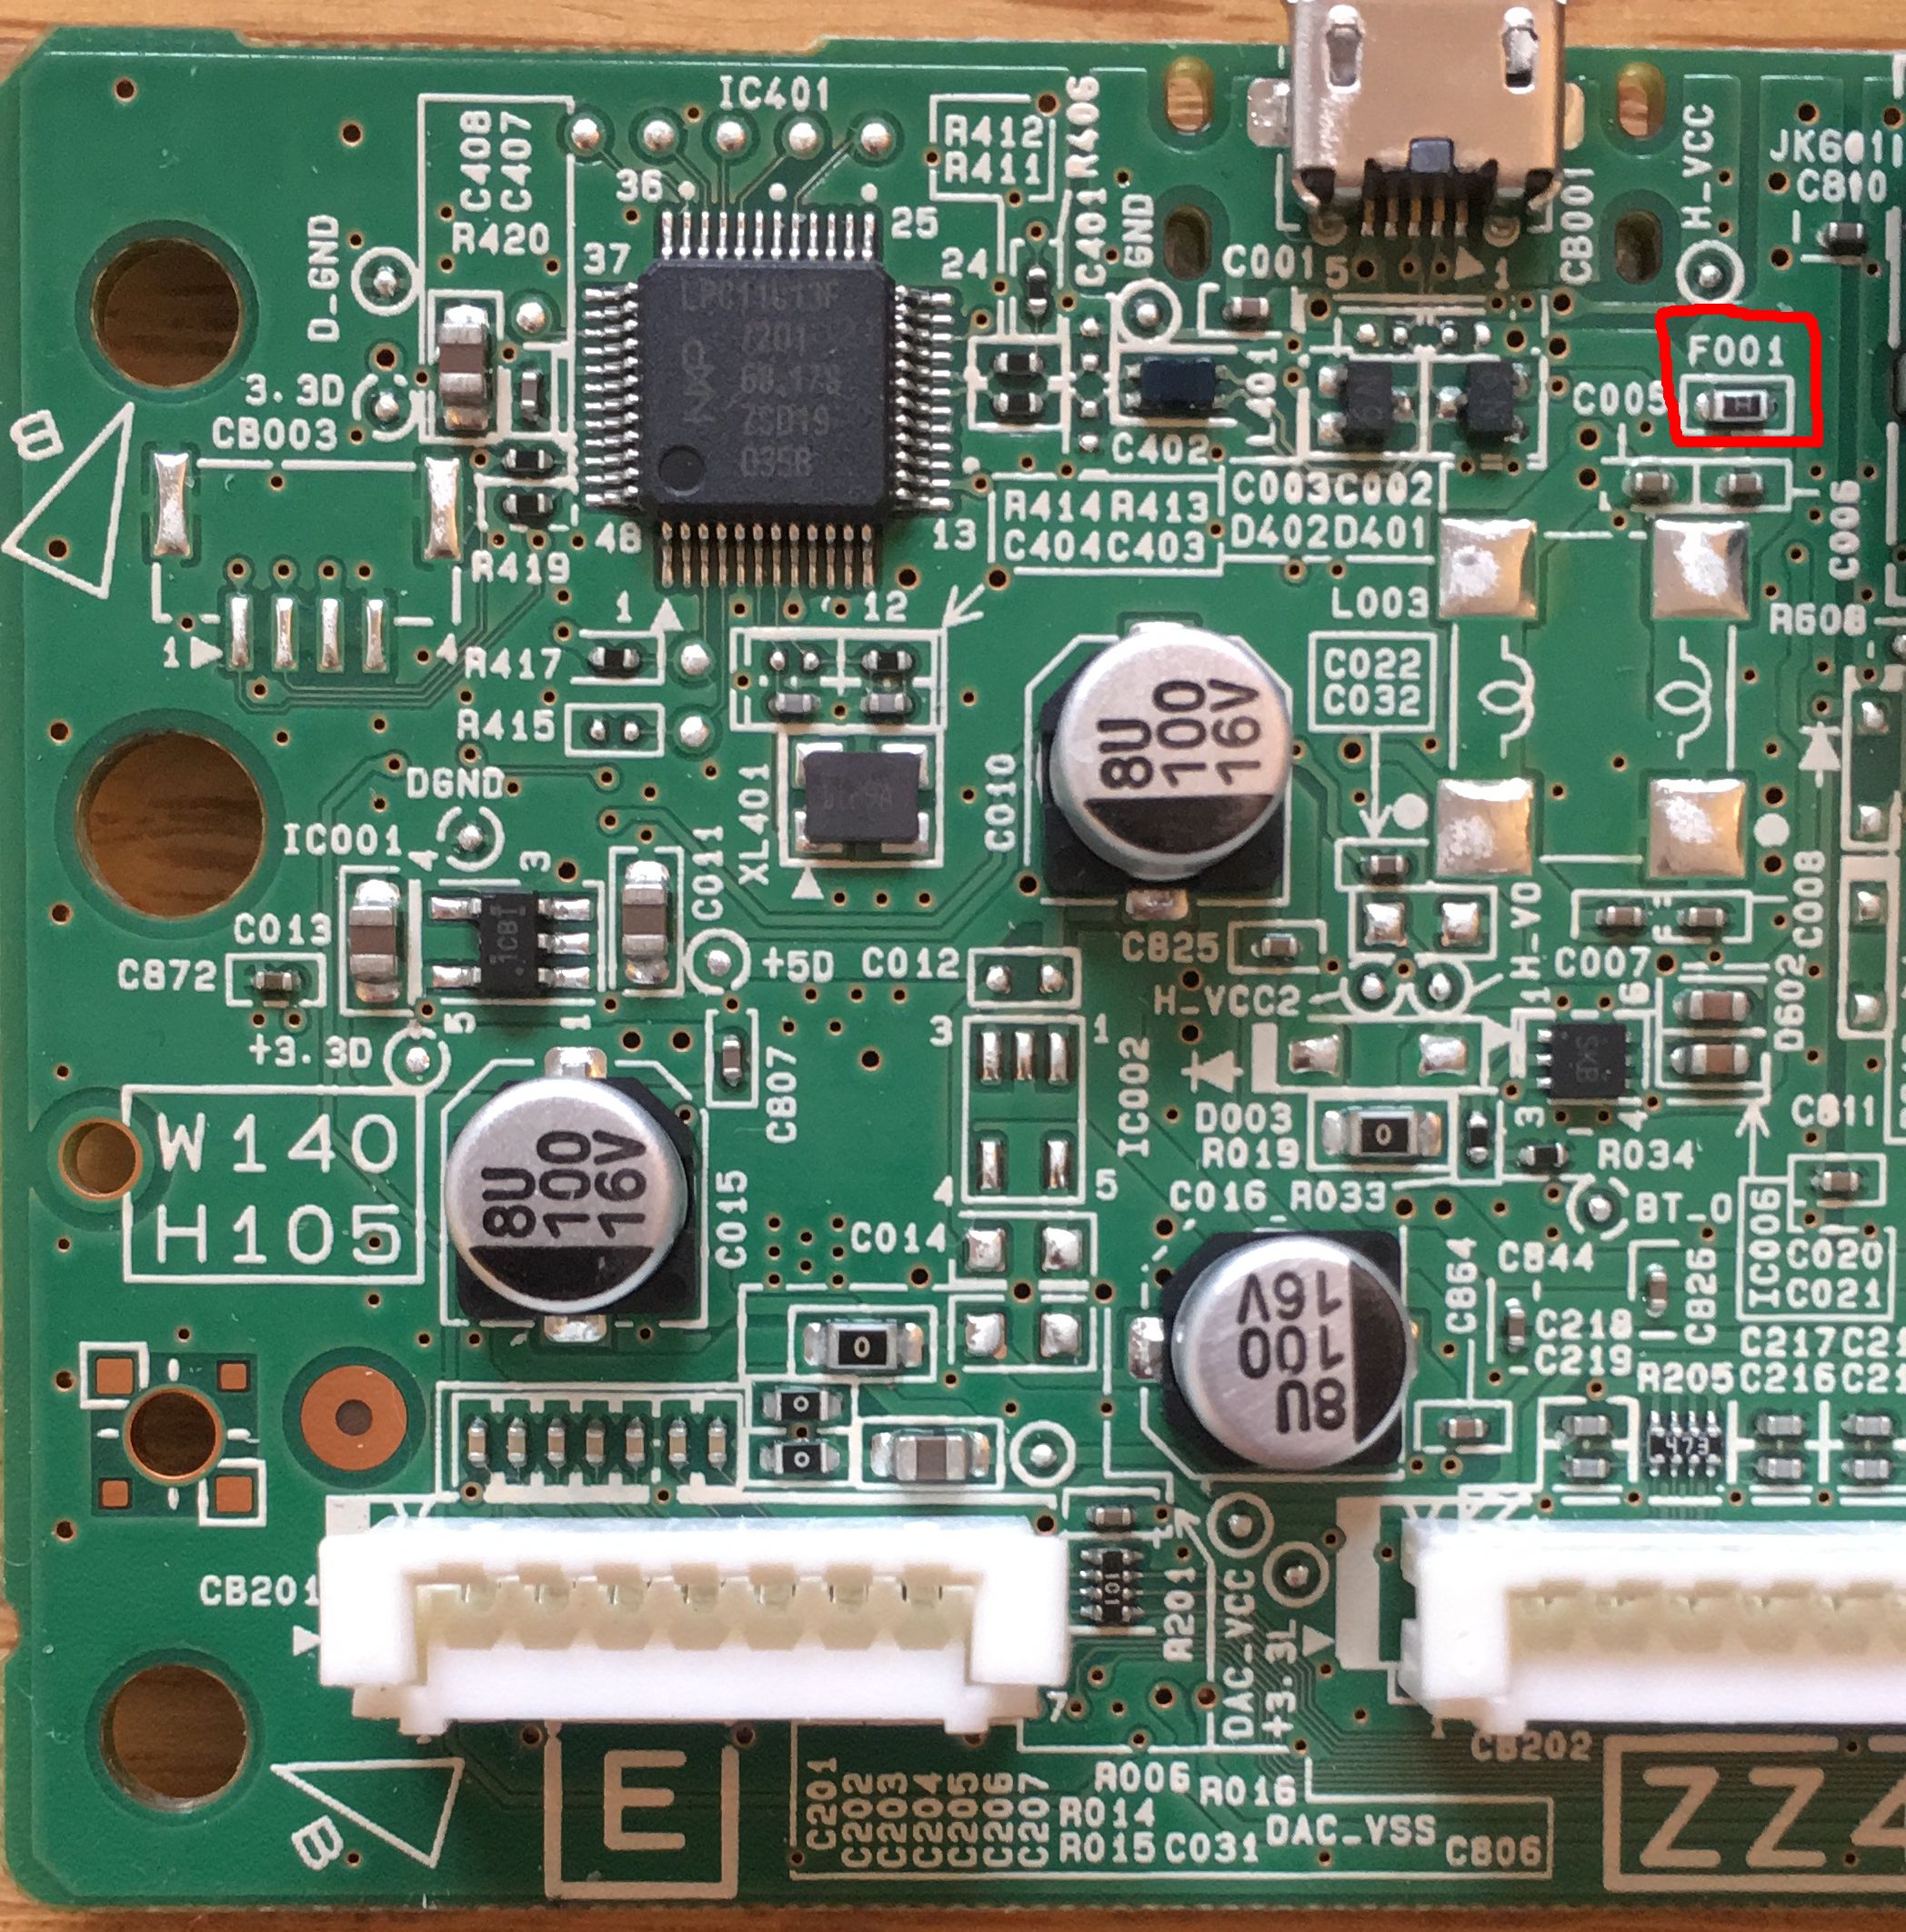
You are going to test and remove the F001 fuse from the main board and replace it with bare wire.

Doing it
- Remove the batteries. Open your keyboard by removing the rear screws, including the ones under the battery cover.
- Flip the entire keyboard back the right way up, then carefully pull up the faceplate and flip it over backwards
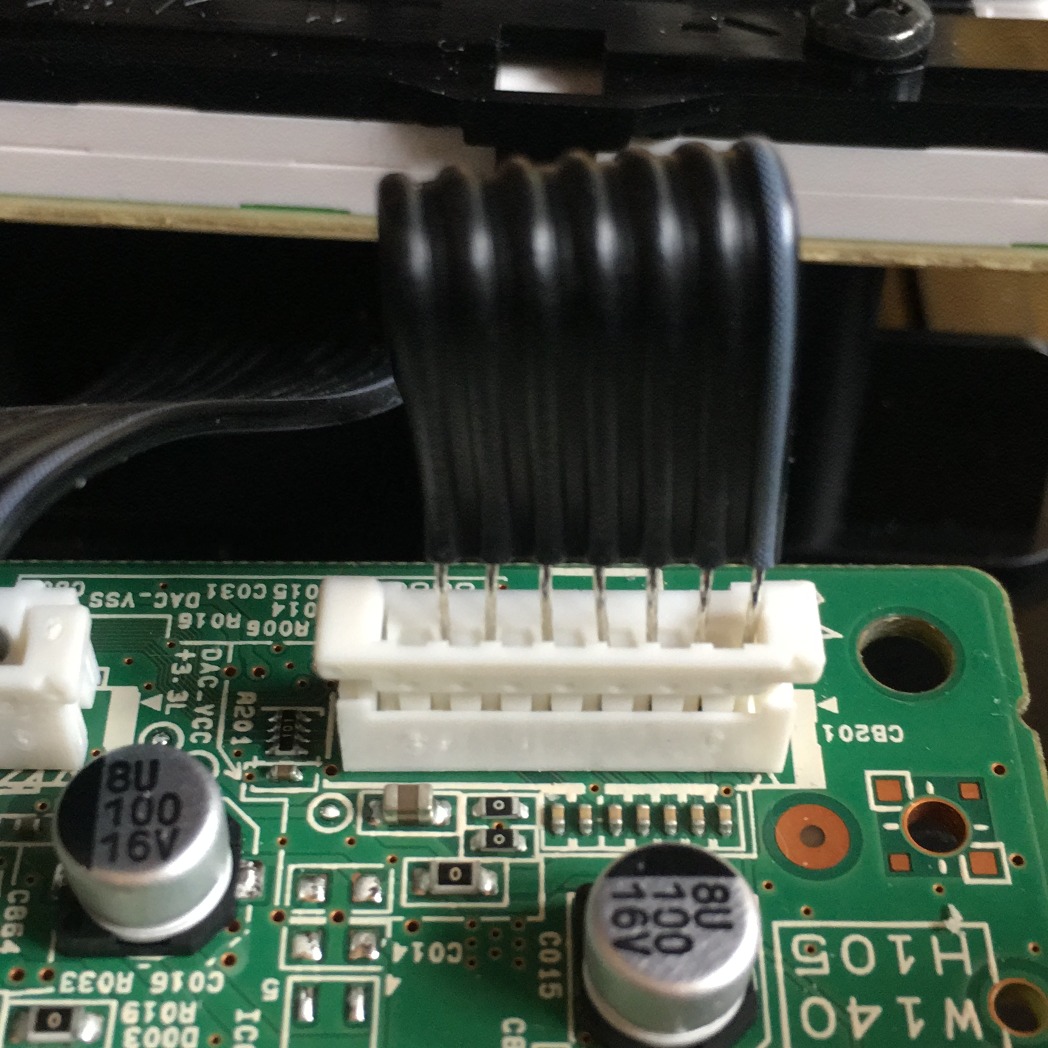
- You can detach the ribbon connectors by pulling up the plastic collar, releasing the bare cables (see pic)

- If you have the appropriate tools, test the Fuse F001 for continuity. You can use the beepy mode on a multimeter to confirm that between the two sides of the fuse… there is no “beep” 😄
- We are going to remove the fuse F001 by heating it and the solder connecting it, then pushing it off the board upwards.
- Warm up a soldering iron. You can use a chisel tip the size of the fuse if you have one.

- Apply heat below (south of) the fuse in the gap between it and C006. Wait a bit and then try wiggling and pushing the iron “north”. Try to apply heat to the solder pads holding the component on. You can try maneuvering the fuse with tweezers as you heat the board solder.
- When it comes lose, pull the fuse off the board and put it to one side on a heatproof surface ♨
- Use your amazing soldering skills to lay down a little additional solder on the pads where the fuse came off
- Prepare the wire by stripping and bending a small bit the right length to bridge the pads, and offer it to the pads, like an ice hockey stick
- Warm one pad at a time, applying more solder as needed, until the wire adheres to one end, and then the other
- Twist or cut the wire to take away the excess which is not forming the connection
- You’re done!
- You can clean up any charring with isopropyl alcohol
Optionally, you can put some padding or tape or something over the connection if you want to protect it.
Afterwards
I found that the keyboard now powers on (yay) under batteries or USB. If you are testing with batteries, make sure they are new or fully recharged ones!
I had a suspicion for a while that it was eating batteries faster than usual. I can’t tell empirically whether this is true. Change the Battery Type setting on the keyboard (Shift + D4 key) to nI if you are using NiMH or rechargeable batteries, and AL if you are using Alkaline/Manganese batteries.
If you would like to talk about this fix, please do email me; ste at this domain.
Good luck, have fun 🎵