Let’s make websites - Part 2
In Part 1, we used Glitch as an immediate way of making a basic website, and we learned some HTML/CSS.
Today we’re going to use the VS Code text editor and it’s git integration to work on a downloaded template for a portfolio site, then we’re going to host it using GitHub pages.
Pre-requisites
- Download and install VS Code from https://code.visualstudio.com/. It’s free, and runs on any platform and OS (pretty much).
- Go to https://html5up.net/paradigm-shift and click ‘Download’ in the top right corner.
- Set aside a folder on your PC/Mac somwhere where you’re going to work on your web projects.
- Extract/Unzip the
html5up-paradigm-shiftzip into your projects folder and rename itportfolio(Mine isD:\git\portfolio)- Inside the portfolio directory you should now see
index.htmletc.
- Inside the portfolio directory you should now see
Btw, HTML5 UP is a great site full of free (with attribution) templates, made by ajlkn. He has since created a service called carrd which is a drag-and-drop website creator. If you give up on learning HTML stuff, you can use that! You just have to pay to attach your own personal domain name.
Open the project in VS Code
- Open up VS Code
- Click ‘Open folder…’ or go to ‘File \ Open Folder…’
- Choose your portfolio folder
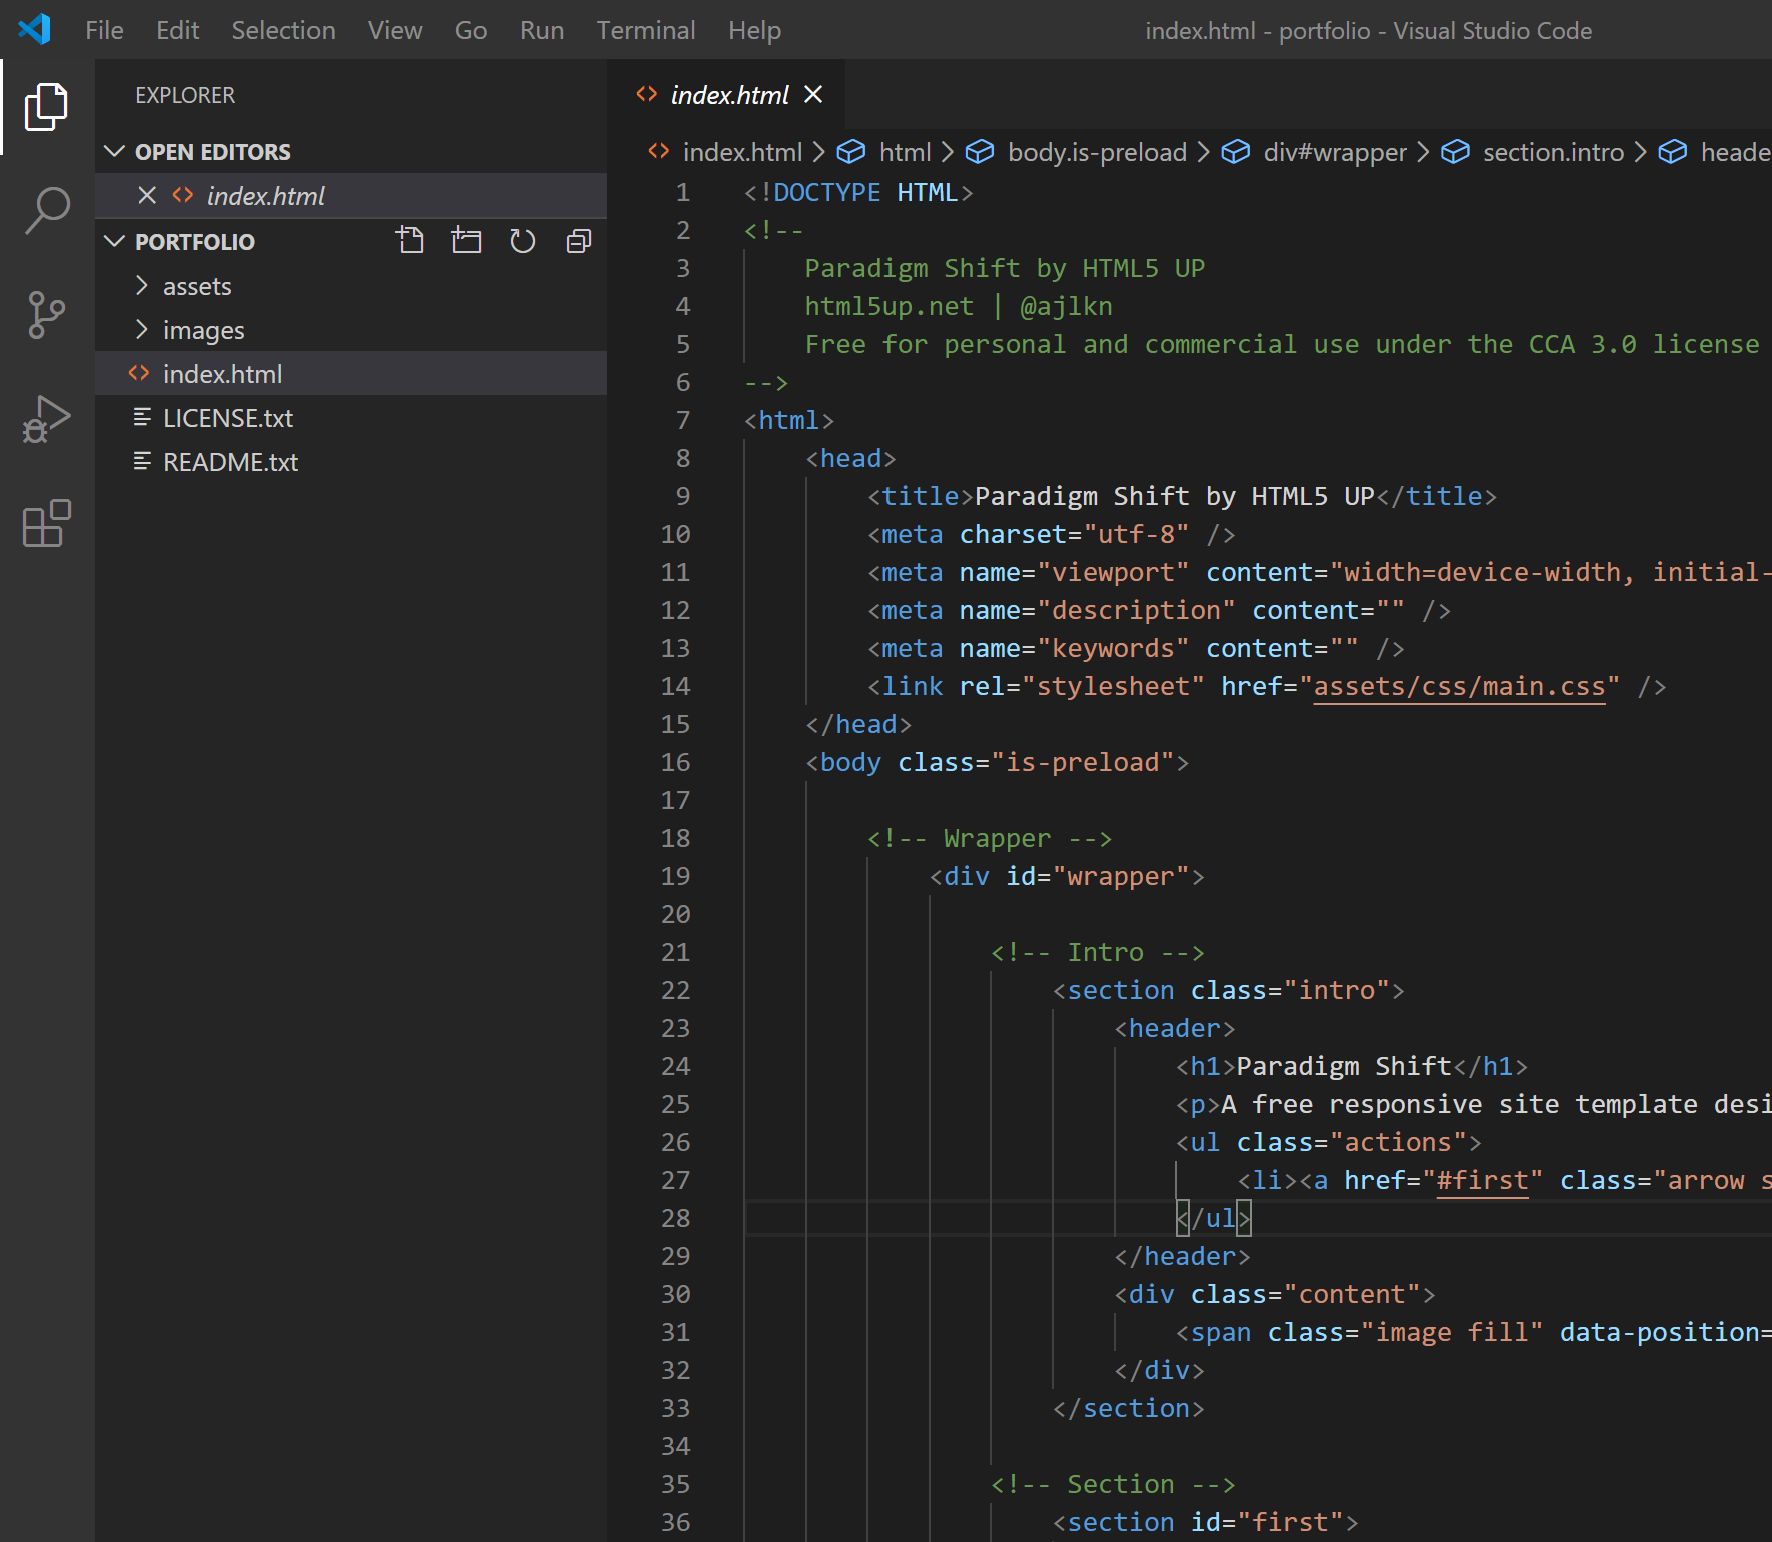
You should now get a view that reminds you of Glitch, with files on the left, and an editor. The beauty of VSC is you can have multiple tabs open if you want to.
(Click to see full size images in this post)
New HTML
In HTML, the following tag is a comment, which doesn’t display anything on the page, it just annotates the HTML source:
<!-- I'm a comment -->
You’ll see that the HTML5 UP source is well commented, to help you work with it.
Also, we now see <section>, <header>, and <main> tags, which are more “semantic” (meaningful) tags which behave just like div blocks. They help to create structure in the document that can be understood by search engines, robots, and tools.
Introducing Git, GitHub and GitHub Pages
Before we go making loads of changes, let’s host this thing for free with GitHub Pages, and learn a little about git.
Git is a version control system. It lets you make milestones (commits) so that you can rewind time when you make a mistake or want to go back to a previous version. You can also create branching variations of your work, and it helps us to work with a team by consolidating changes. But we’re going to focus on the individual commit mechanism. Git adds a repository to your work to track this info.
GitHub is an online service - now owned by Microsoft - which mirrors your git repositories for free. If the repository is a website, you can also switch on GitHub Pages which will host your site at github.io.
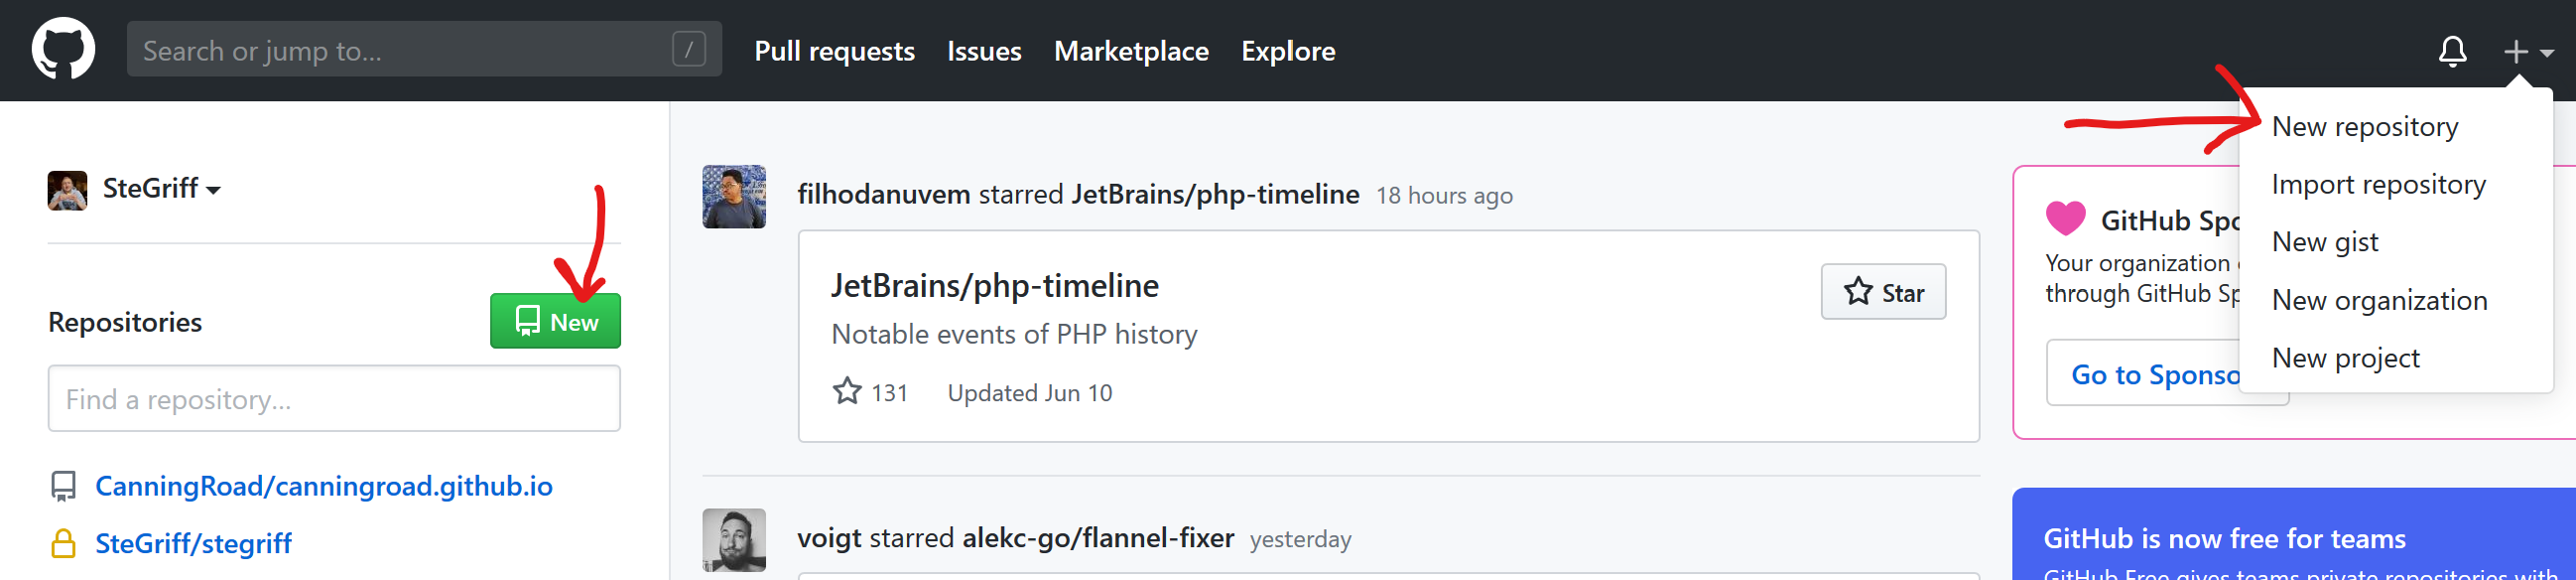
- Go to https://github.com and log in with the account you made in Part 1
- Find the green ‘New’ button or click the Plus in the top bar then ‘New Repository’ (see pic)
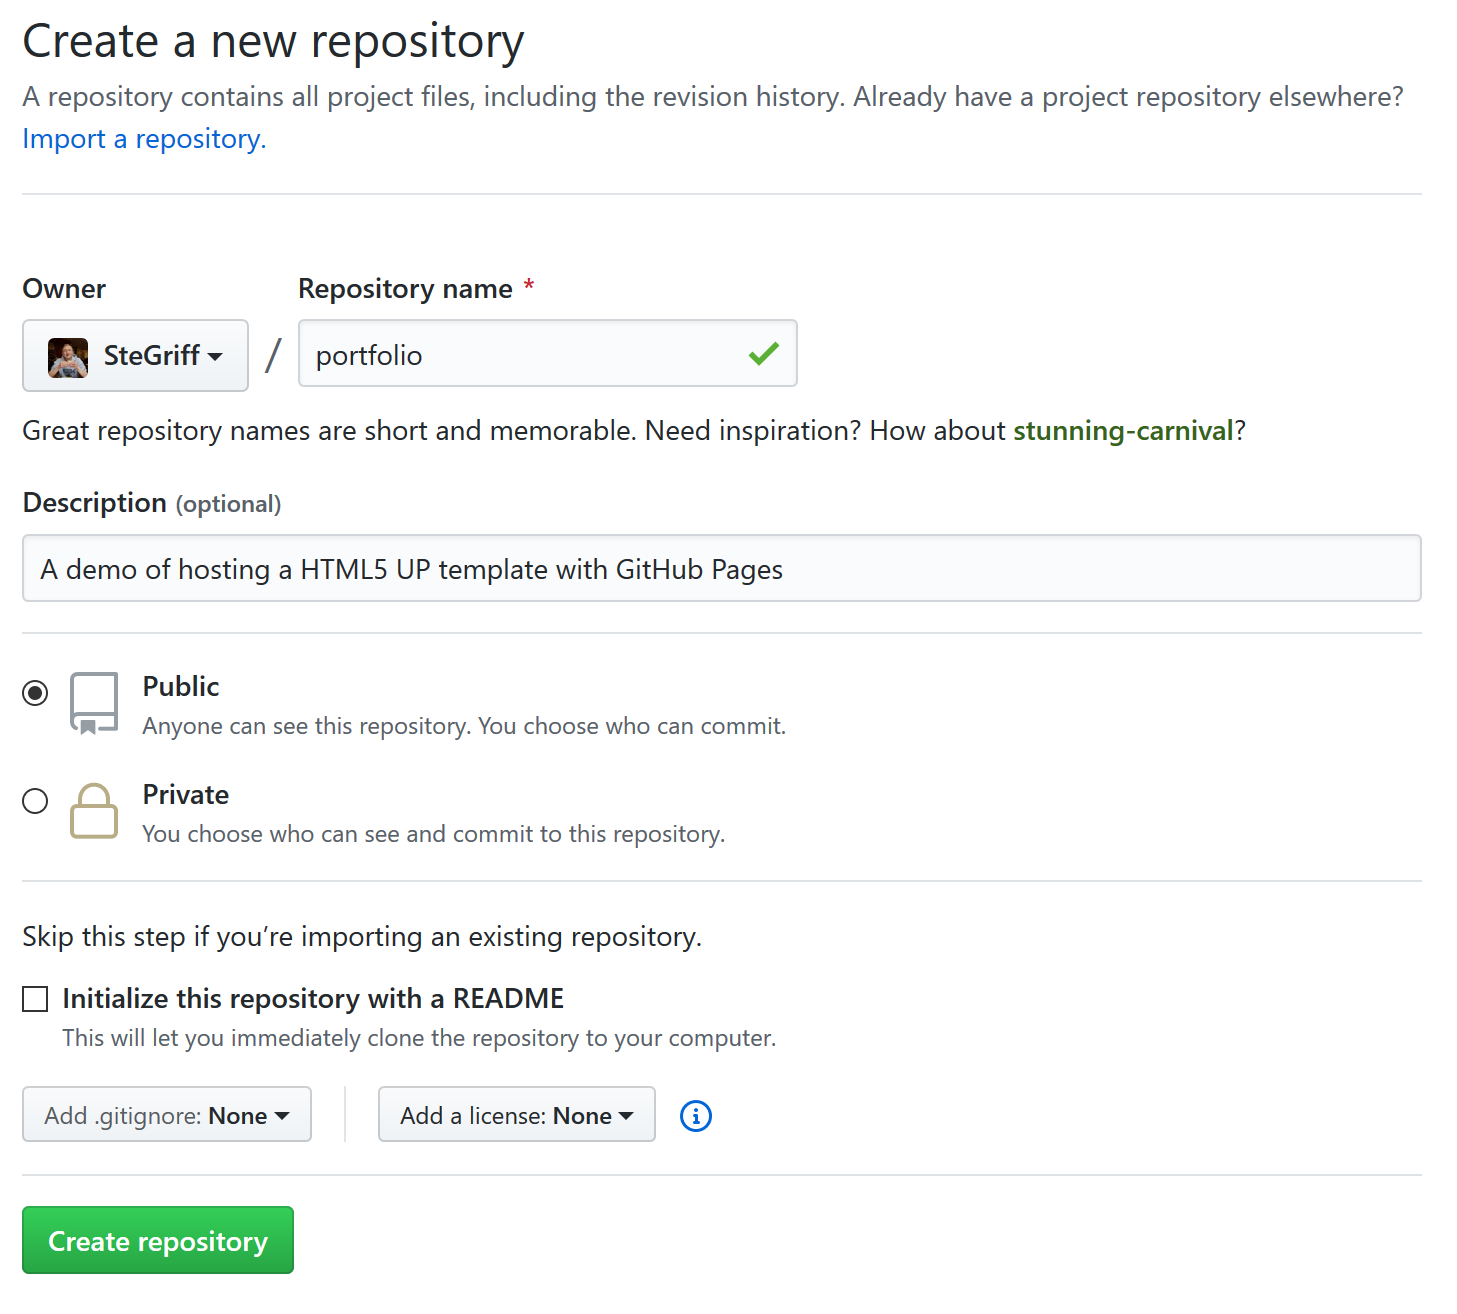
- Call the repo
portfolio- Later, its web address will be
{username}.github.io/portfolio
- Later, its web address will be
- You can enter a description. Leave the privacy setting on ‘Public’ and leave alone the controls for adding README and LICENSE, our repo already has those.
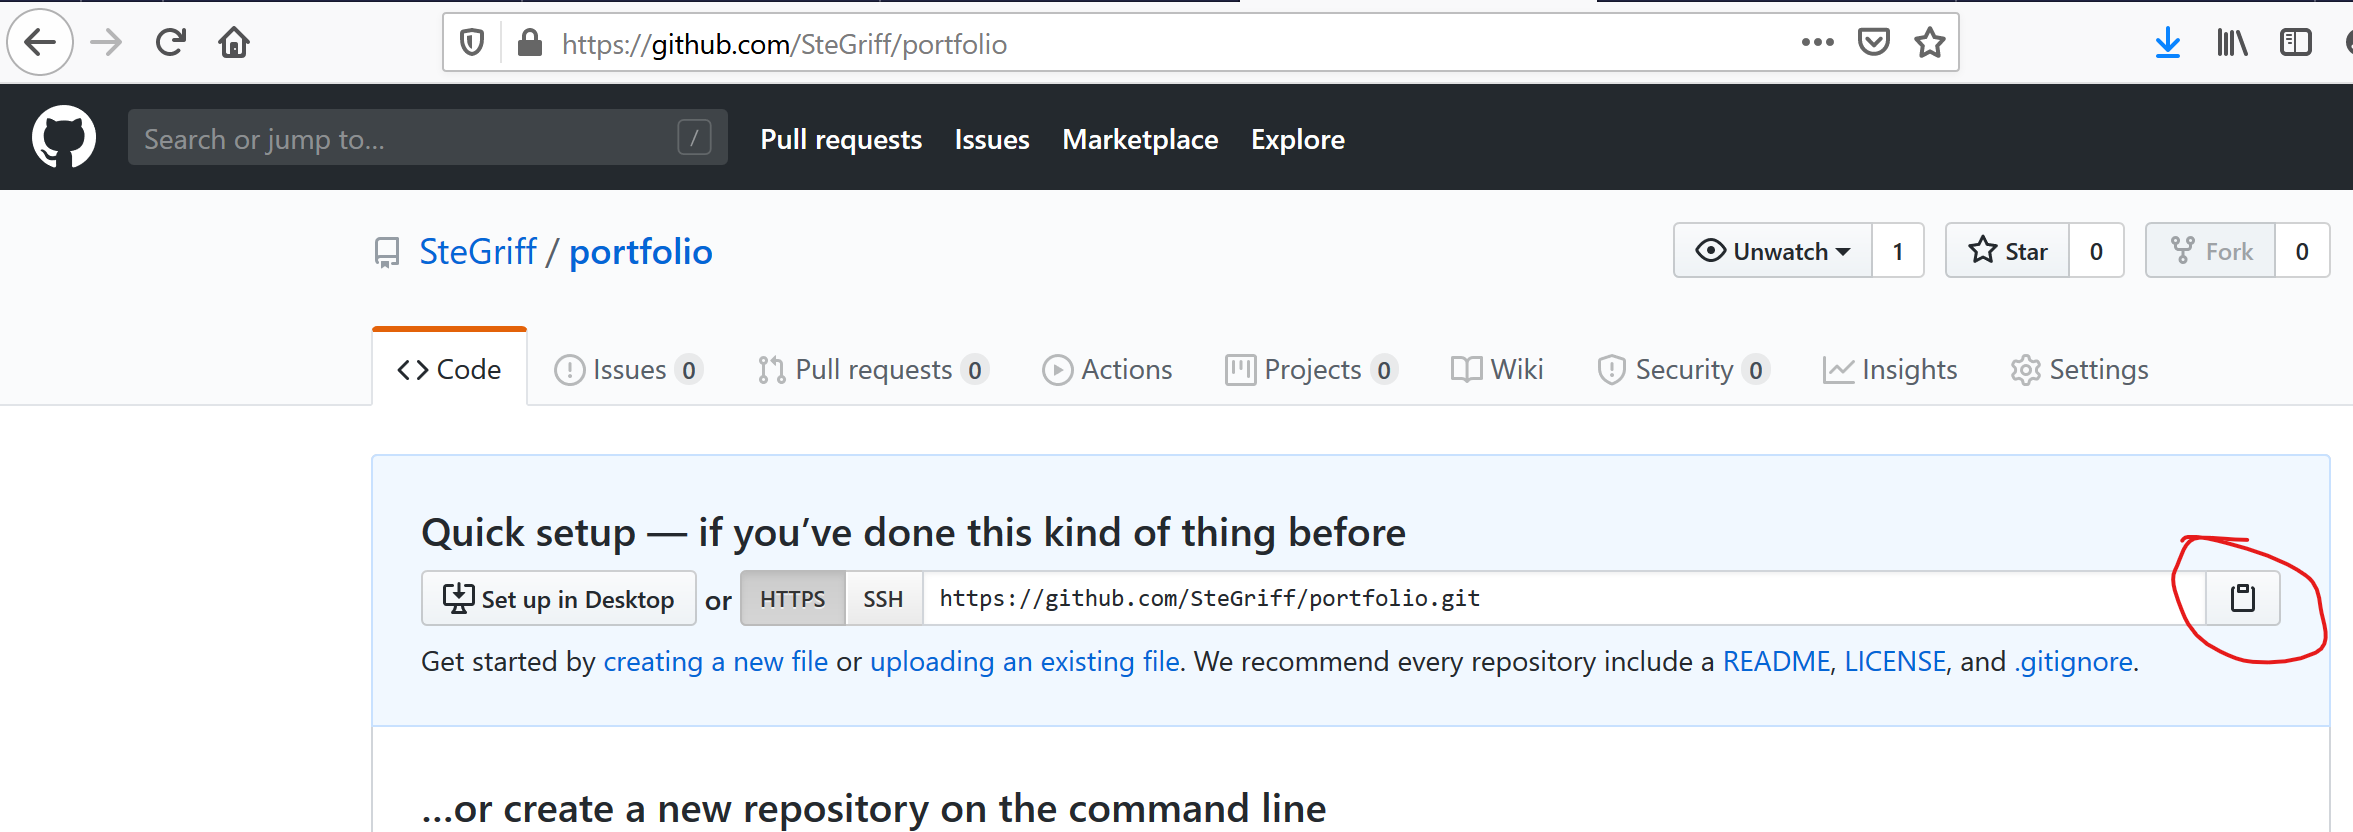
- When the repo is created, you’ll see a Quick Setup screen. Use the button to copy the ‘HTTP’ address of the repository.
We’ve now created an empty vessel which we can sync with a git repository on your local computer.
Set up our local repository and make a commit
- Switch back to VS Code
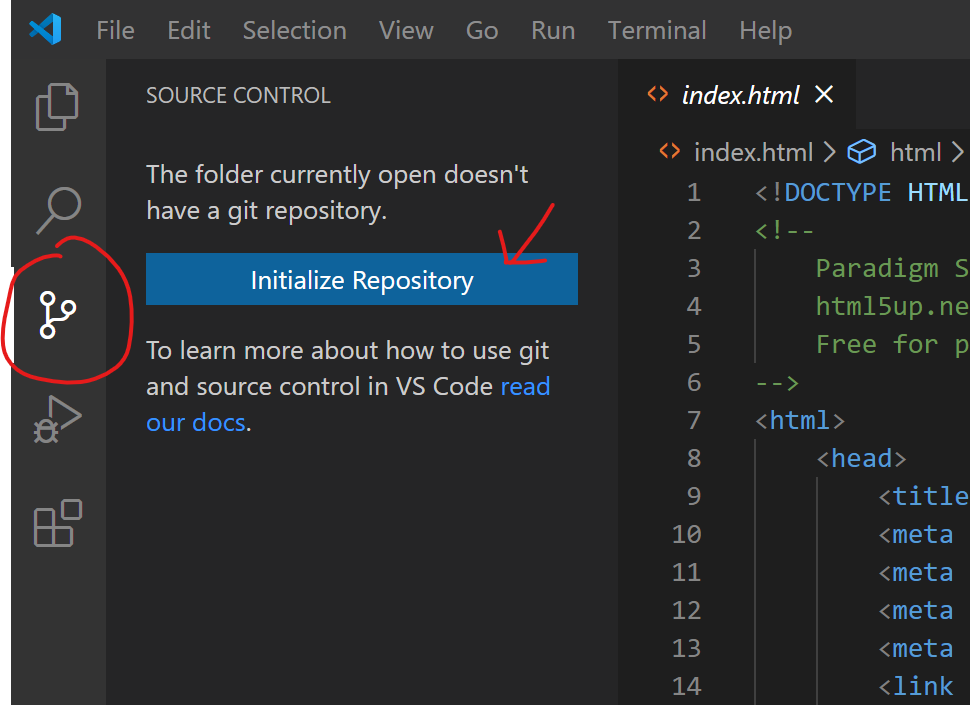
- Click the little branching icon in the left nav (this is SCM, Source Control Management)
- Click the ‘Initialize Repository’ button that appears
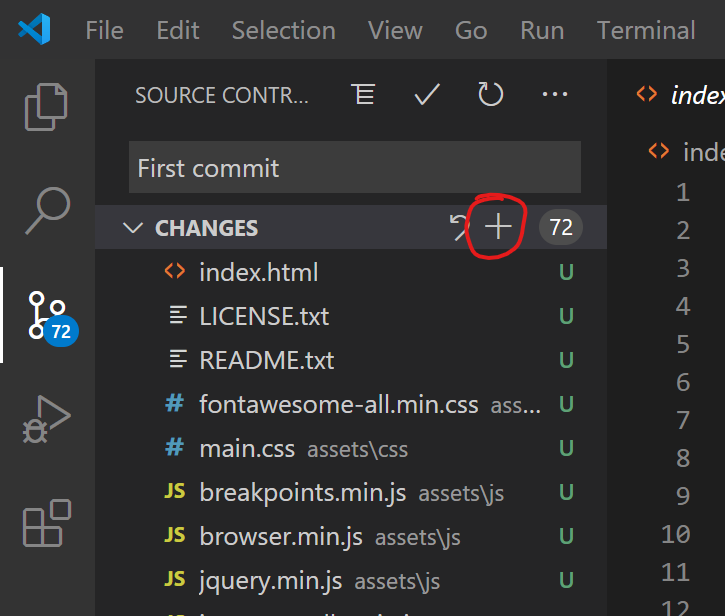
- When you see the list of files, click the ‘CHANGES’ header, then the plus button that appears next to it
- This ‘stages’ all the files that you’ve changed. That is, I want my next commit to contain the changes I made to every file.
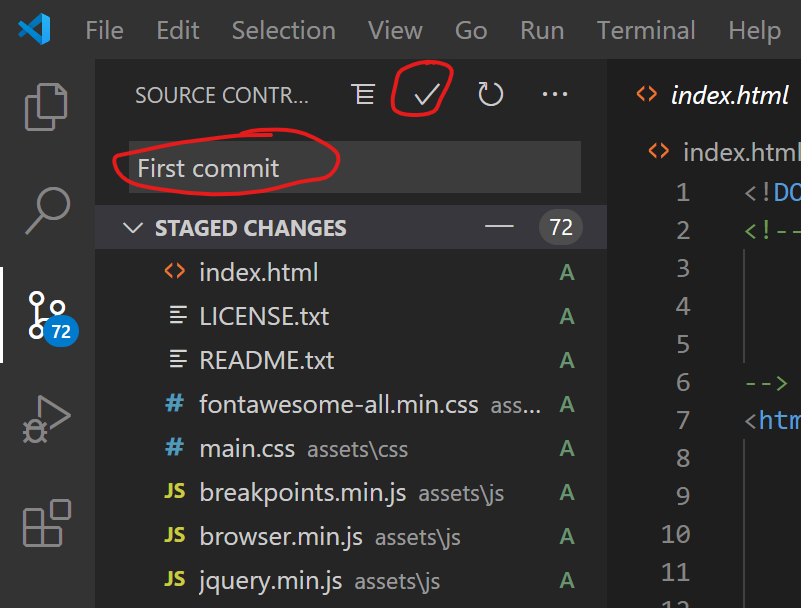
- Type in a ‘Commit message’ in the text box.
- For a first commit, many devs just type ‘init’ in here but you can say whatever you like. I’ve written ‘First commit’.
- Click the tick/check icon above the text box
Sync changes from VS Code up to GitHub
Now we’re going to tell VS Code that we want to associate this local repository with the one we made on GitHub, which is called a ‘remote’.
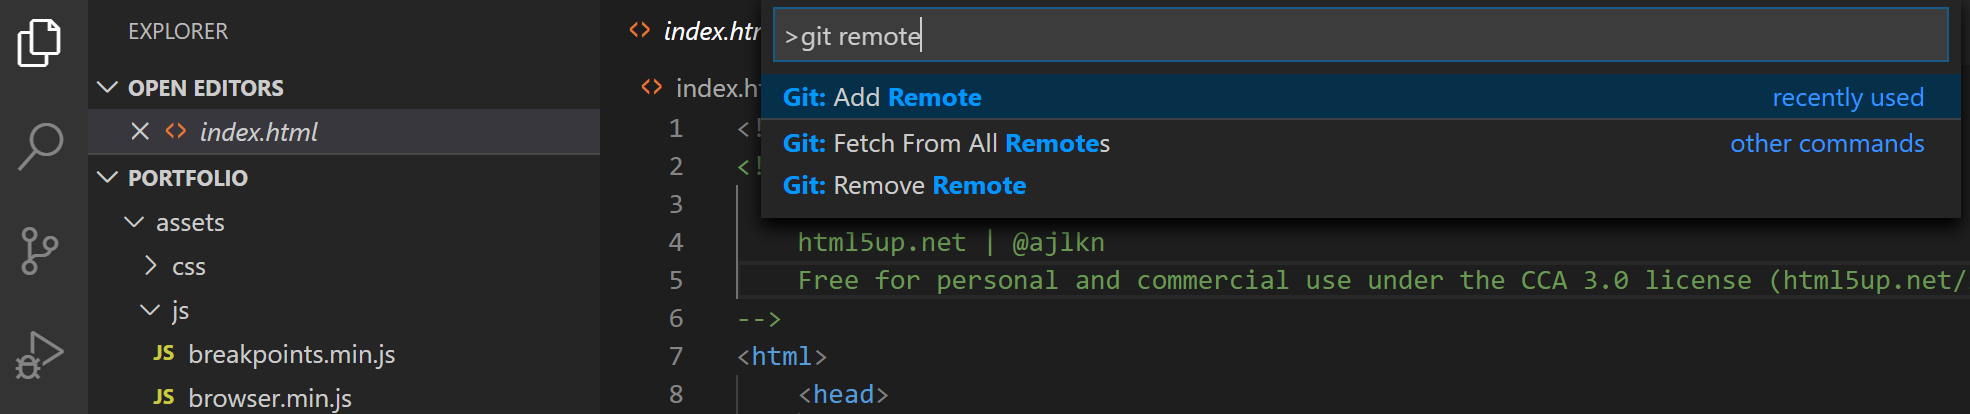
- In VS Code, press
Ctrl+Shift+P(Cmd-Shift-Pon Mac probably) to open the neat little command window - Start typing ‘git remote’
- If you don’t see the option for ‘Git: Add remote’ you could be on an older Code version. Update to the latest version!
- Hit Enter
- It will ask you for a remote name. Enter origin
- Now it will ask for the URL. Paste the repo URL we got earlier from GitHub that ends in
.git - It will be ready pretty quick but it won’t tell you anything
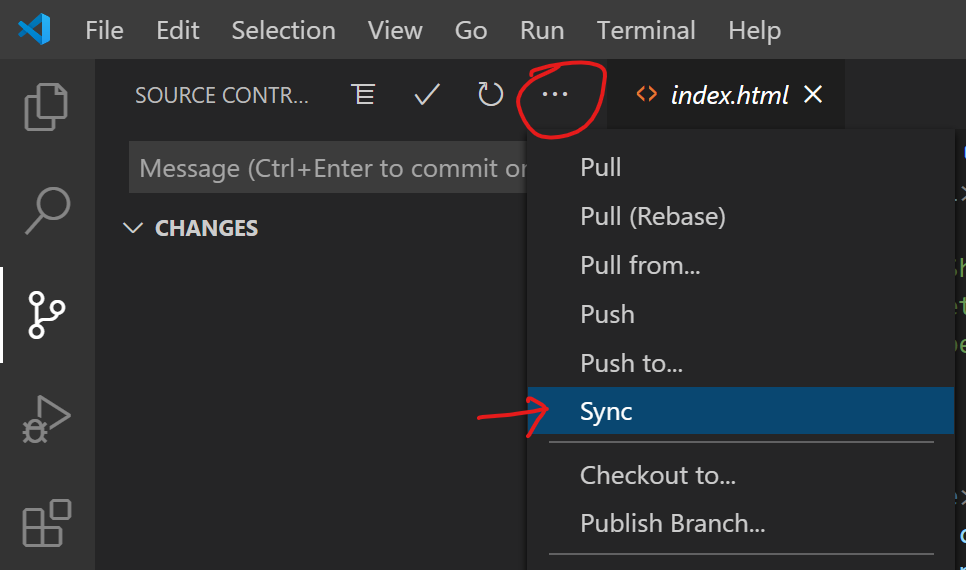
- In the SCM side bar, click the Ellipses for more options and click Sync
- When it says “The branch ‘master’ has no upstream branch. Would you like to publish this branch?” click Yes
- After Sync, you might get a message that says “Would you like Code to periodically run ‘git fetch’” - You can click Yes or No, it doesn’t matter if you’re working on your own.
Did it work?
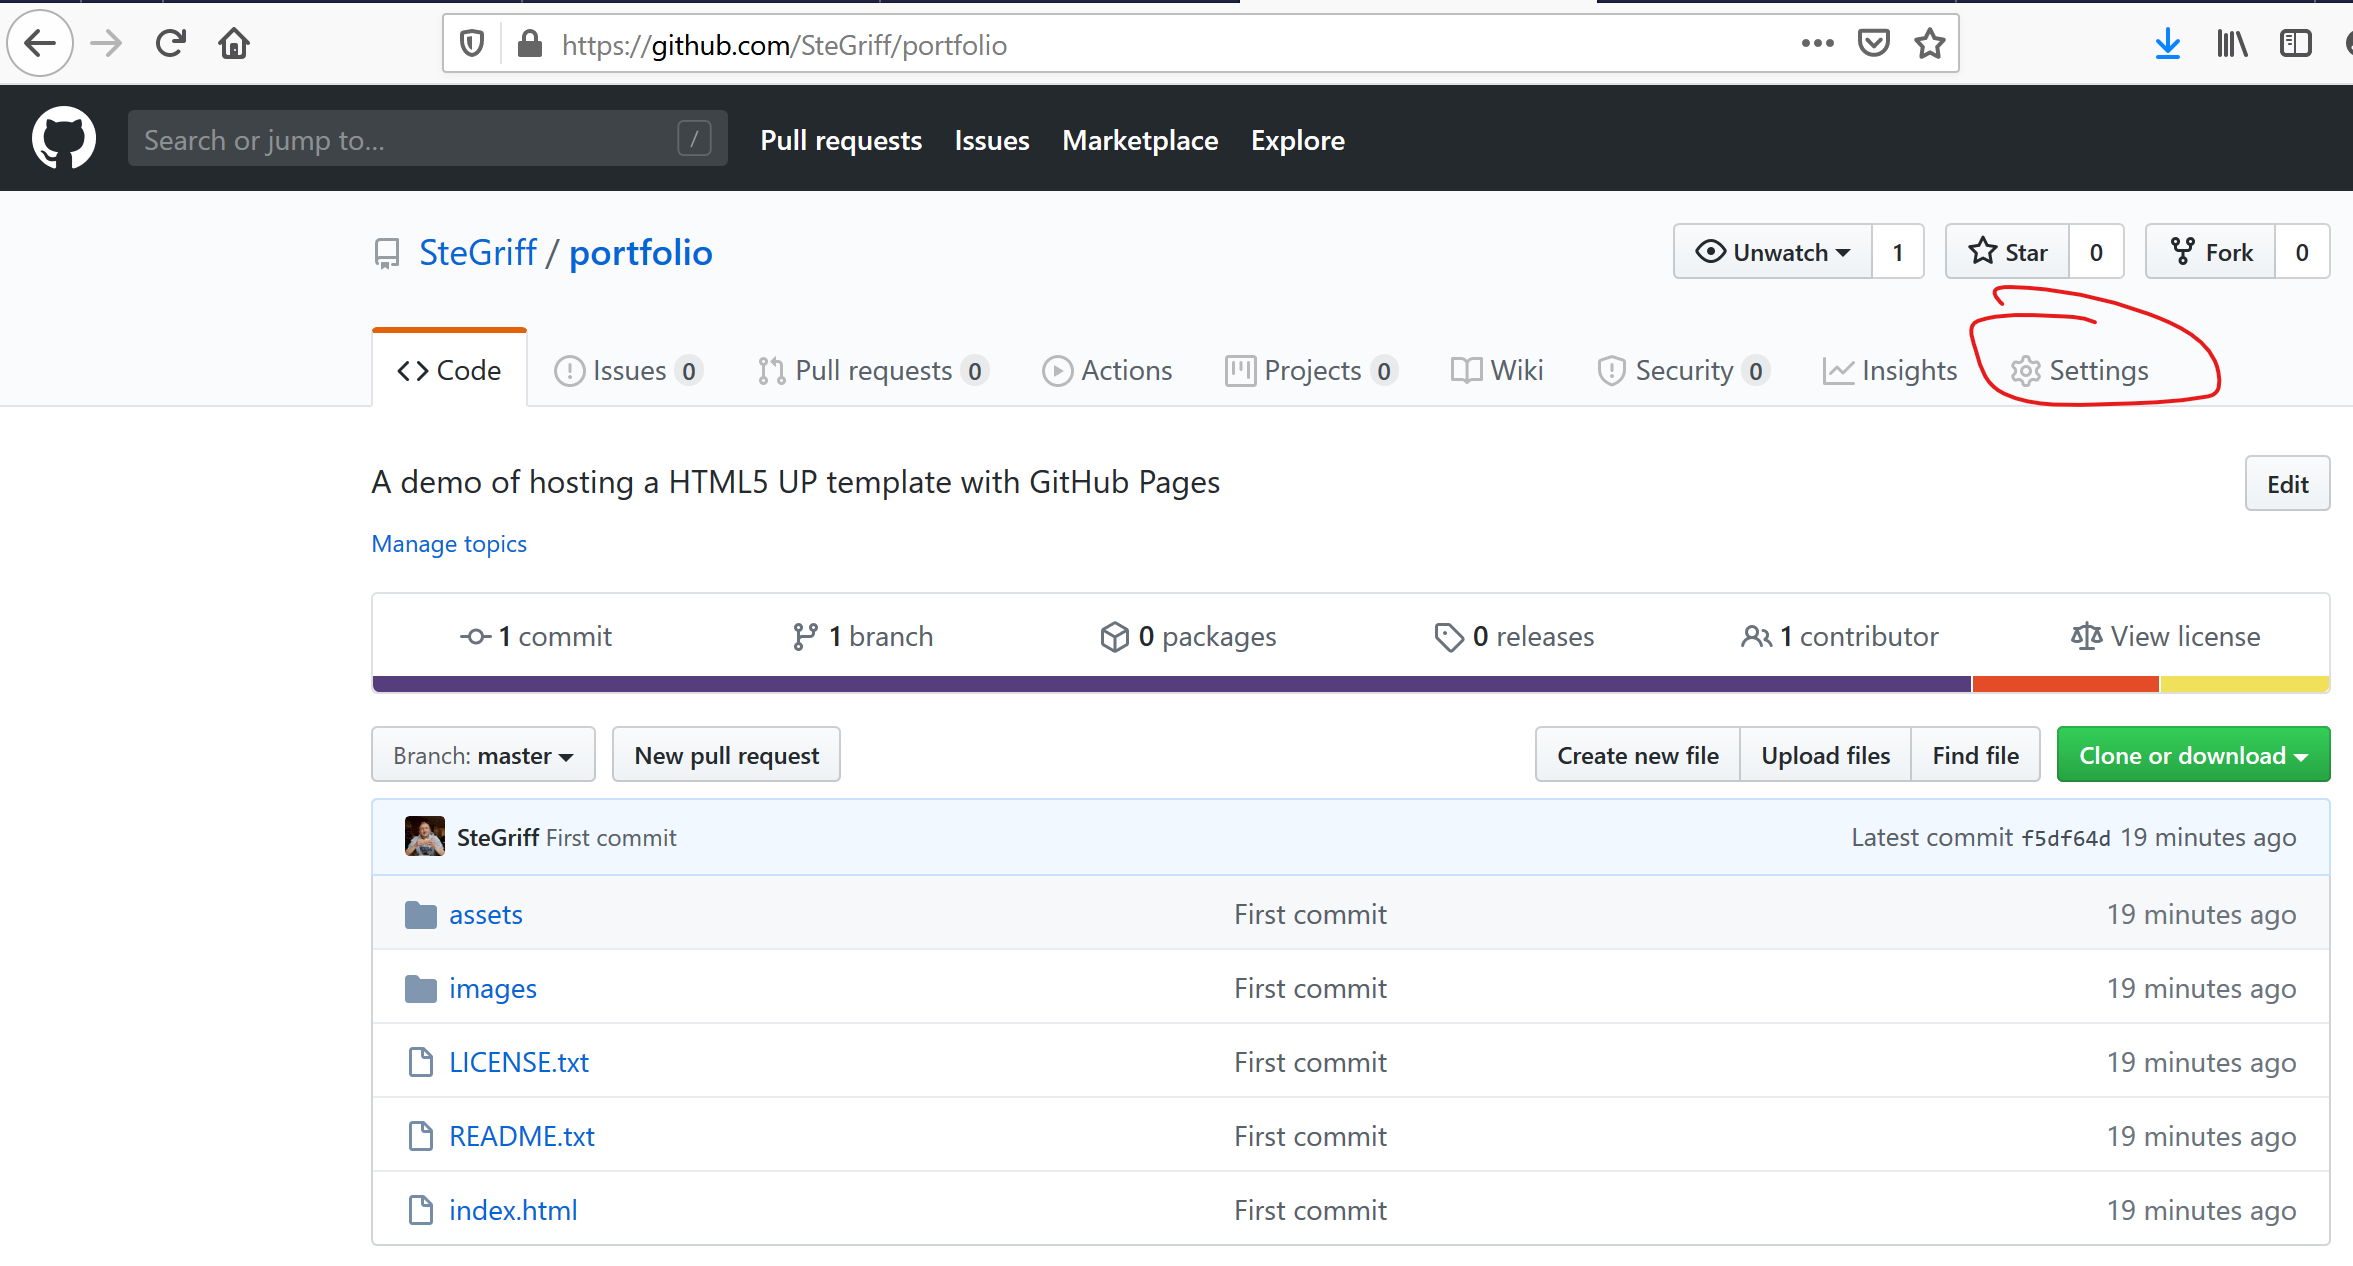
To check out whether our work synchronised with the online repo, go back to your repo page on GitHub where you saw ‘Quick setup’, and refresh the page. You should see all your files like below:
Setup GitHub Pages (in a few clicks)
We’re nearly there.
What we have now is a backup online of not just all your website files, but all your “commits” - your progress milestones.
Now we need to tell GitHub that this is a website they can host for us.
- Go to the Settings tab at the top of the repo
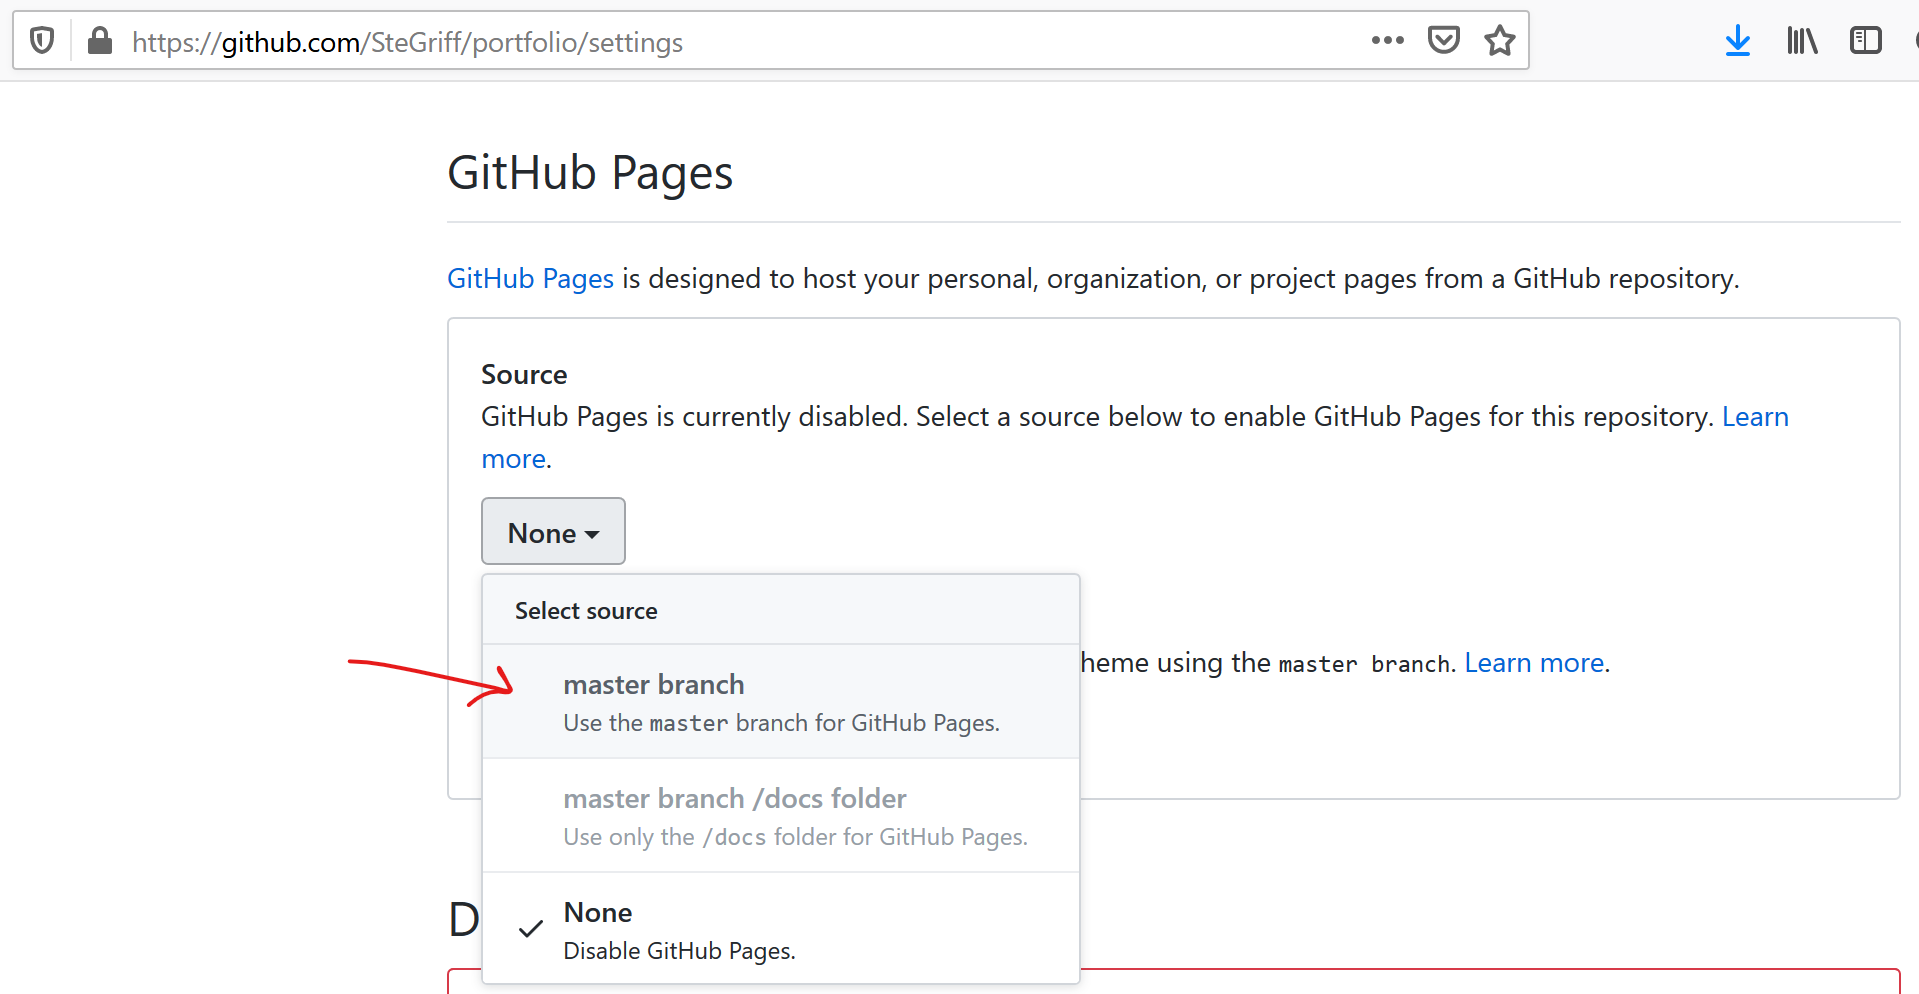
- Scroll down til you see the GitHub Pages section (pictured below)
- In the ‘Source’ dropdown, choose ‘master’
- That’s it
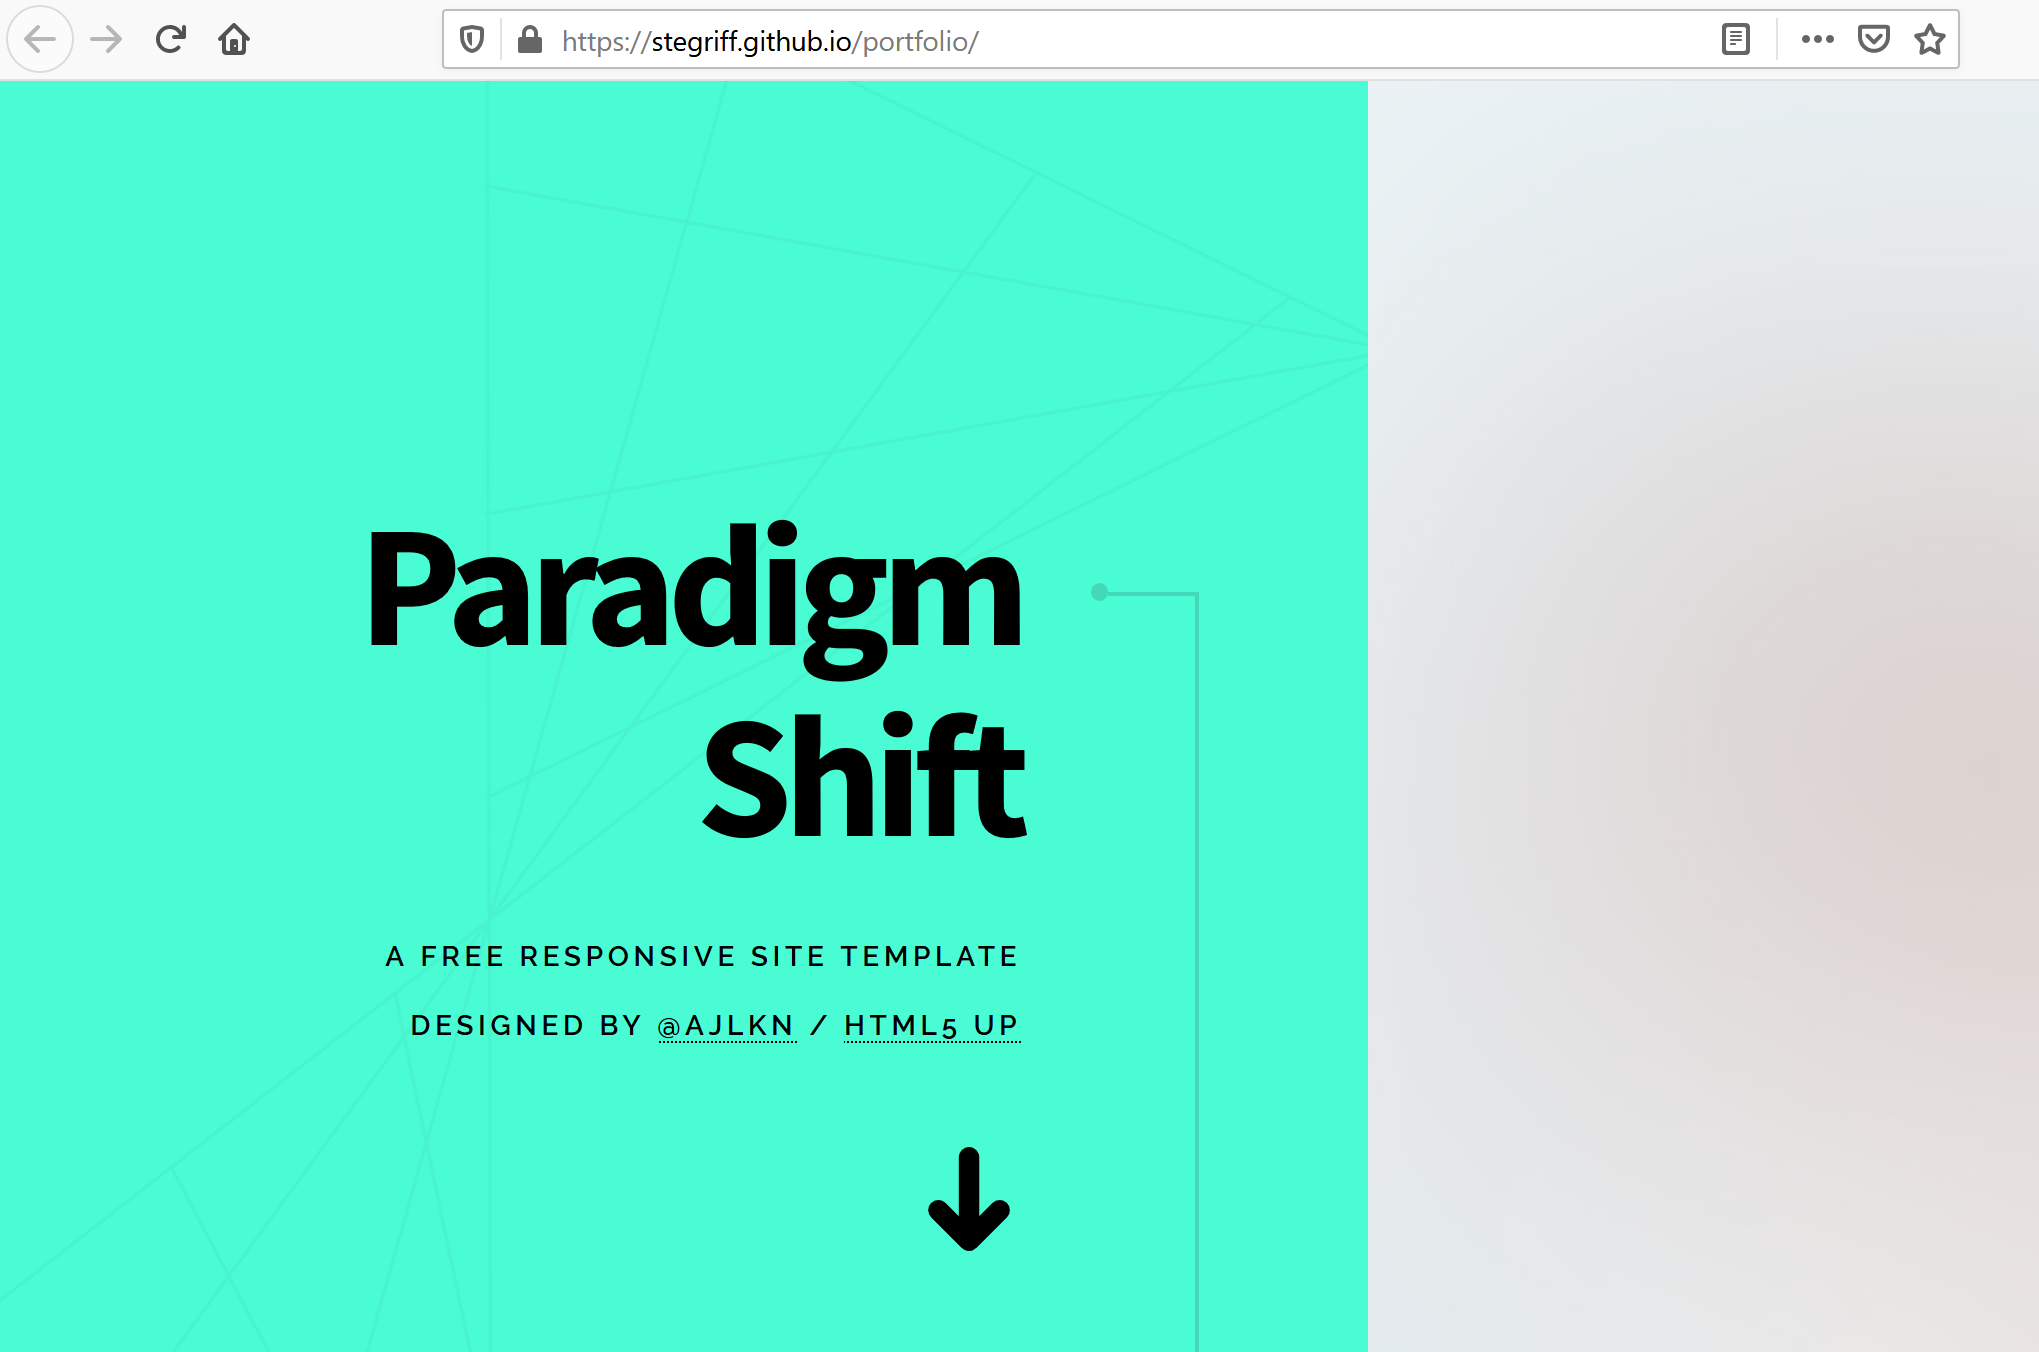
Give it a moment, then go to https://yourname.github.io/portfolio except with your username at the start. You should see the site template is alive!
Going forward
Make and preview changes locally
You can make changes to the website in VS Code on your PC. Just open index.html in a web browser to look at it.
Make commits when you like what you see
When you want to commit changes (make a milestone), open up the SCM menu in VS Code.
Stage all the files you want with the Plus icon on the individual files or on everything. Enter a commit message and click the tick.
Sync to publish your site
To sync to GitHub, go in the SCM bar, click the ellipses, and choose Sync.
You can also do this in the Ctrl+Shift+P command bar by typing ‘Sync’