Mixing and Mastering
Lately I have been making some chillhop music. I was listening to a few lofi/chillhop playlists while working from home in lockdown, and thought “I could do this”. So I tried.
I’ve found that throwing together some sounds in a musical way is often the easier part. Making it sound production-ready, and ready to go on Spotify, is really hard. I’ve learned a lot, not just about using the tools, but about how you acheive what we might call “loudness” and “clarity”.
My First Track
My first track with any kind of popularity is called ‘summerhouse’. Musically, it’s based on a wurlitzer, a piano, ambient outdoor noise, and lofi drums. At the end there’s also a music box.
I don’t have real audio monitors or a sound treated room. In my budget studio headphones (Beyerdynamic DT 235 - which have a roughly even frequency response from 20Hz to 20kHz) at good volumes, the track sounds loud and clear.
Based on common advice, and help from a producer friend, I tested the track out on one or two “grotboxes” - bad speakers. In my case I used some <£20 iPod clock/radios that I have lying around. At first the track had a problem that any loud wurlitzer chords or bass drum kicks would distort or rattle the speaker, so I tuned the EQ of those parts until it played nicely.
I thought I’d done OK.
What I should have checked
The best mastering advice that I’ve had so far is test at low volumes. If you listen to your track at 1/4 of the usual volume and it frustrates you because it sounds unclear or muddy, something is wrong!!
Let’s look at some charts, generated using Audacity’s Analyze -> Plot Spectrum on MP3s of summerhouse (left) and a newer track (right).
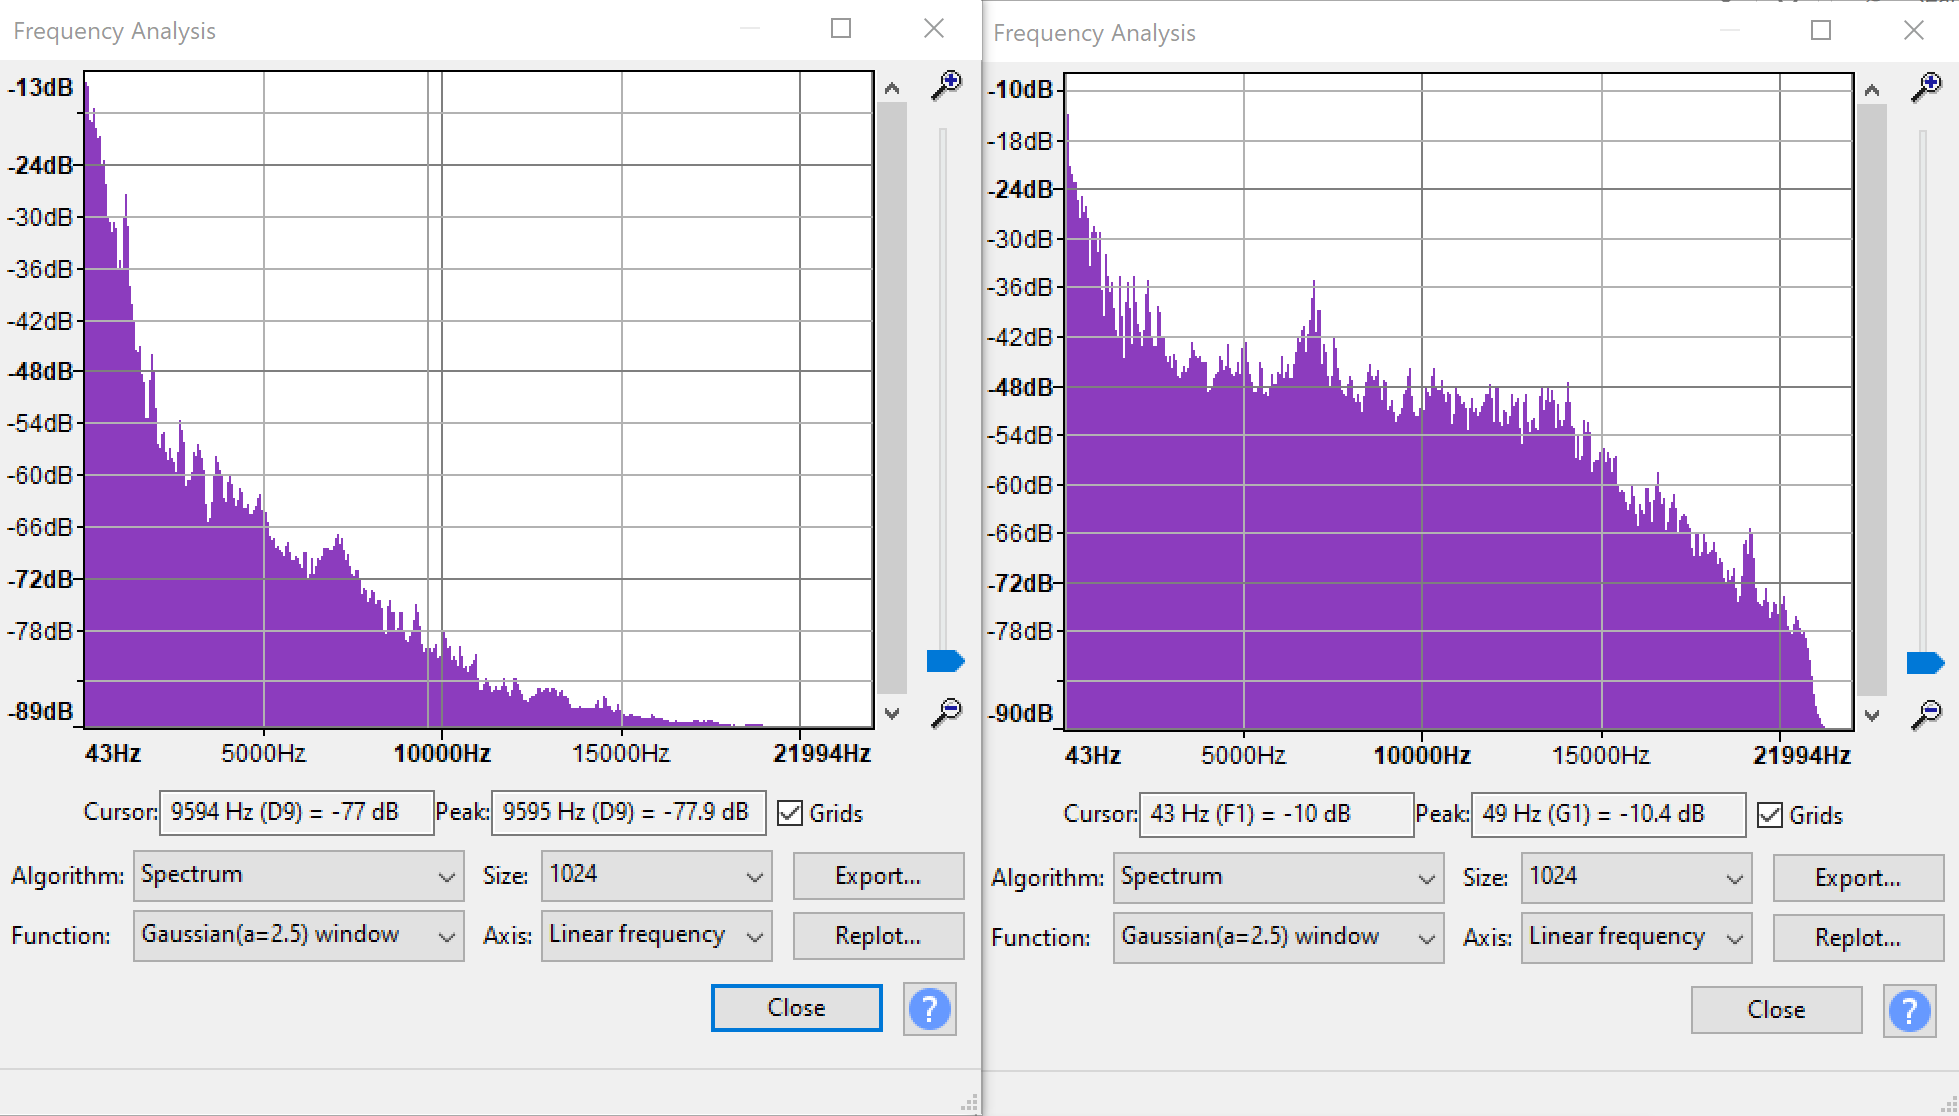
The X axis (left to right) on each chart is sound frequency. “Low” sounds like kick and bass are on the left, and “high” sounds and “sparkle” are towards the right. The height of each region, on the Y-axis, is how loud that frequency is. The bulk of “music” happens in the 40Hz to 4000Hz range but sounds above 4000Hz are still valuable for that “sparkle”.
Things to notice:
- The loudest volume in summerhouse is -13dB whereas the newer track acheives a louder -10dB. Neither is spectacular as we’ll see later.
- Summerhouse has all its volume at the low end and none anywhere else. Above 2000Hz would be mostly inaudible at low listening volumes.
How did this happen?
Firstly, when two instruments play at the same frequency, their volumes at that frequency are added together. Basic maths. If a piano is making a noise at 100Hz and the kick drum hits at 100Hz, there’s a big spike there.
When you’re doing the final master of a track, you go through a “maximizing” step that brings the volume up. Say you have a frequency curve like summerhouse. The maximiser pulls up the loudest part (the low frequencies) until they’re just below “peaking” (0dB) or whatever you’ve told the limiter to limit at (perhaps -1dB). But because it dragged up the whole curve evenly, the higher frequencies still have very low volumes. They couldn’t be brought up any louder because of the big loud spike under 200Hz that hit the ceiling.
What you can change
I made a slight improvement with the track on the right, which should be dropping soon, called ‘by the lake’.
For ‘by the lake’ I found a feature in my mastering plugin (Ozone Elements) which will detect the frequency spread of your track and automatically apply an EQ curve to the final output that allows it to maximize more evenly. Pretty clever.
The downside is that you might find that your head-rattling sub-bass has been tamed, the kick sounds lighter, that kind of thing. Frequencies that you set to really PUNCH have been reined in.
So clearly there is more aritstry and finesse to creating an EQ’ed mix that can be maximized well.
A professional track
Here is the frequency analysis for my favourite track, by a dance/pop producer who I think makes extremely clean, sharp, punchy mixes.
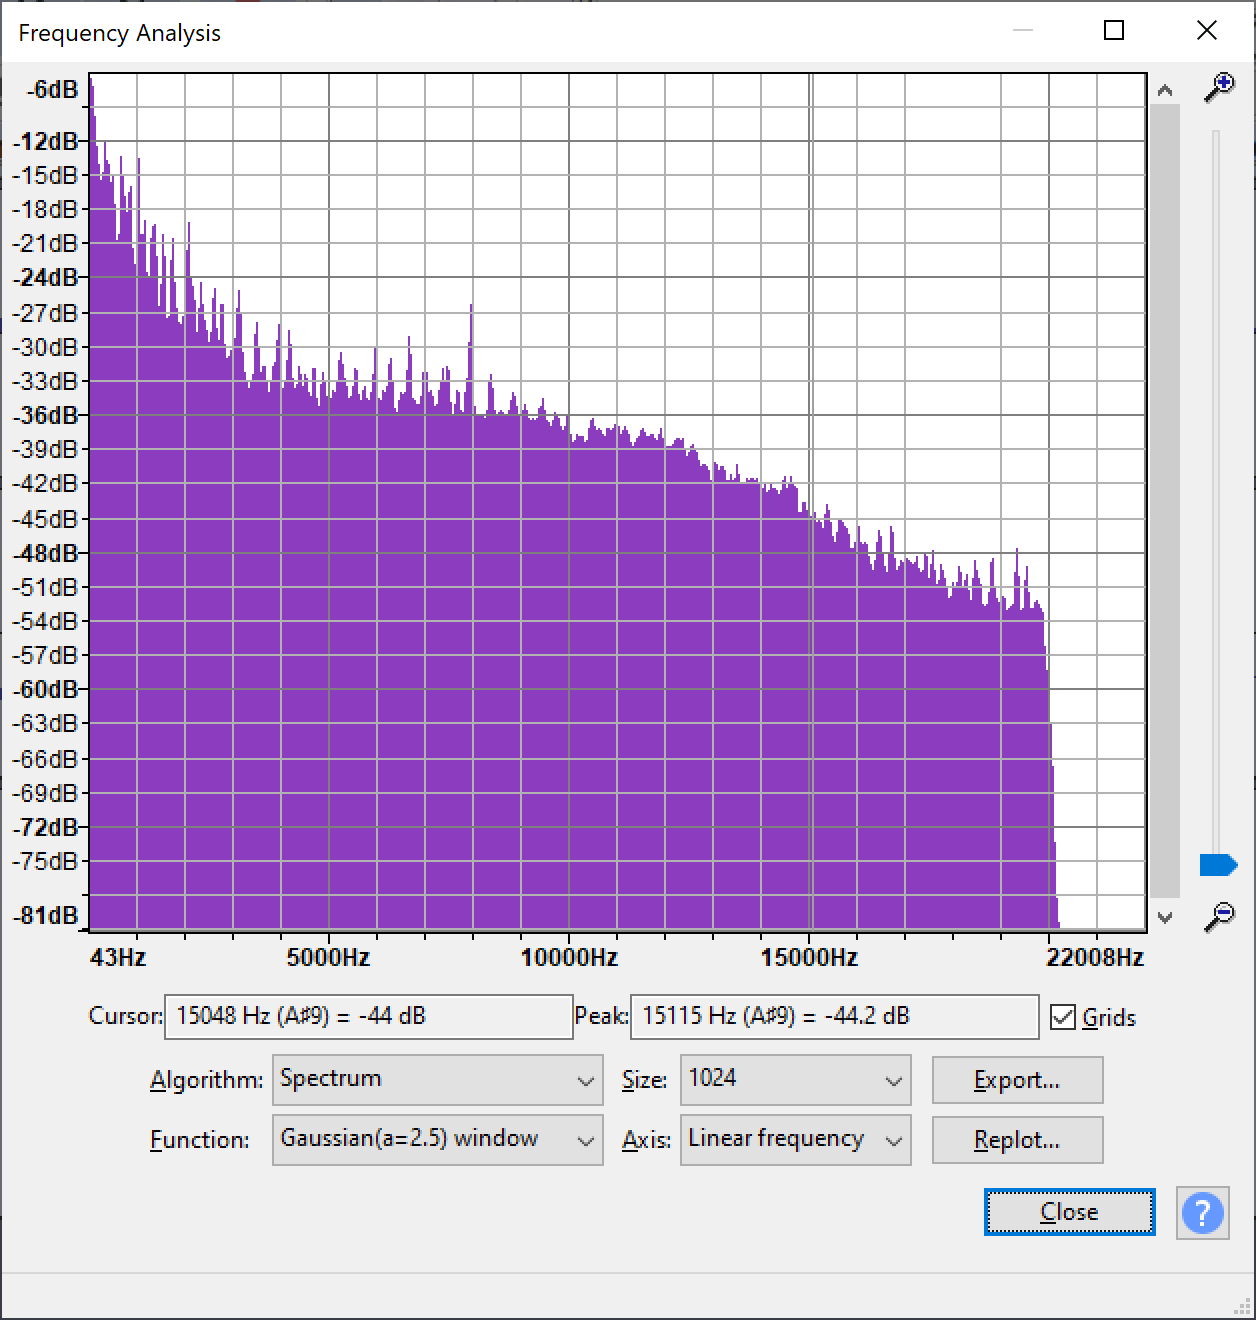
Wow, this is next level. The top of the chart is -6dB, much louder than mine. Strikingly, every frequency below 10kHz is above -36dB loudness.
I looked at the waveform for the track and found something interesting:

The waves actually reach all the way up to the ceiling/floor, but they’re not “hard” limited; it’s almost like guitar distortion where overtones are used to flatten the peaks of a waveform… I don’t know what tool does this. Maybe it is just a limiter. Audacity detects these as “peaking” events.
This suggests to me that the producer likes to really crank his maximizer up to get as close to 0dB as he can and allows some sounds to just fall victim to the limiter. But to get that beautiful frequency spread, he must do some fine work understanding the frequencies in the composition.
‘til next time… make cool stuff together. 🎚🎼